.png&w=1920&q=75)
.png&w=1920&q=75)

PICATINNY CARRY HANDLE SCOPE MOUNT

PICATINNY CARRY HANDLE SCOPE MOUNT
TOP ADD-ON'S
Loading add-on products...
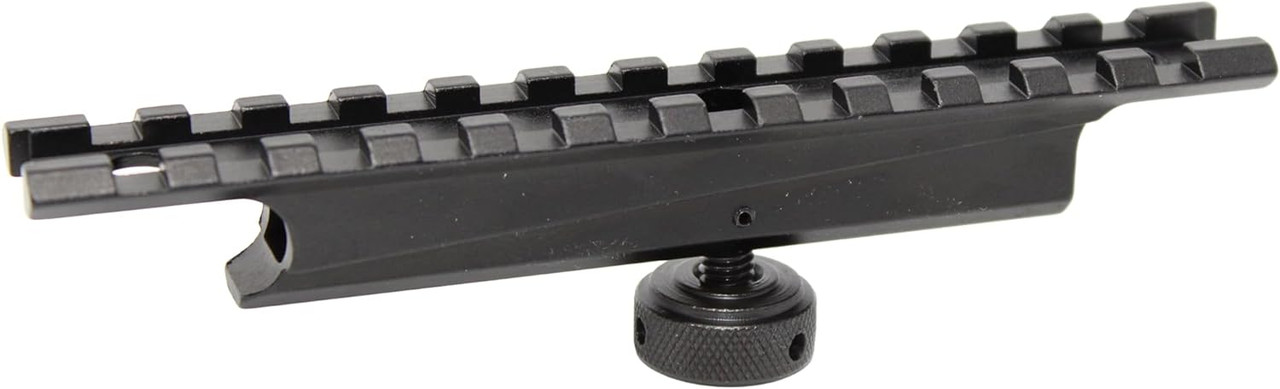
If you're looking to enhance your shooting experience with something reliable and user-friendly, you'll appreciate the detachable carry handle scope mount we've got. It's a game-changer for accurate shots, thanks to the solid platform it provides for your scopes. Imagine being able to aim with precision every time!
Not only does it offer top-notch accuracy, but its versatility is pretty impressive too. This mount comes with a 12-slot picatinny rail that's over 5 inches long, yet it's super light - just 2.3 ounces! This means you can attach various optics or red dot sights without your gear feeling heavy.
Compatibility won't be an issue either. Our carry handle scope mount is designed to fit perfectly with our Ozark Armament AR 15 Carry Handle Rear Sight, and it's also compatible with most other major brands. So, no matter what your current setup is, chances are this mount will be a perfect fit.
Installation is a breeze. You won't need any complicated tools or too much time. It attaches to your carry handle rear sight in seconds, thanks to the large self-locking thumb nut. It's all about making things simple and secure.
Durability? Check. This mount is all metal, built to withstand regular use and the challenges of the elements. The hard coat anodized finish adds that extra layer of protection, ensuring it stands the test of time.
So, if you're in the market for a scope mount that's accurate, versatile, easy to install, and durable, our Ozark Armament Carry Handle Scope Mount might just be what you need. It's a practical choice for any shooting enthusiast!
Backed by our NO B.S. LIFETIME WARRANTY!
Frequently Asked Questions
What does this mount attach to?
What optics can I mount on it?
How much does it weigh?
Is it durable?
What is the warranty?
Stay Mission Ready
Get 10% OFF your first order + Get exclusive deals, new product alerts, and tactical tips delivered to your inbox.
Limited time offer! We respect your privacy. Unsubscribe at any time.